2026 Best Guide to Optimizing Temporary Filling Procedures

Time:2026-10-10 Author:Liam
0%

Temporary fillings protect prepared teeth while permanent restorations are being planned, fabricated, or delayed. Their success depends on more than placing material into an open cavity. Moisture control, cavity cleanliness, material selection, bite adjustment, and patient instructions all influence clinical performance. Optimizing Temporary Filling Procedures requires a careful balance between speed, comfort, durability, and biological safety.

In daily practice, dentists often work under difficult conditions. Saliva may collect around a deep preparation, the patient may have limited mouth opening, or the temporary material may set unevenly. A dry field helps improve adaptation. A smooth margin reduces plaque retention and irritation. Checking the bite with articulating paper can prevent a patient from feeling one tooth strike first. Small details matter.

A small mistake matters.

Current guidance supports using materials appropriate for the treatment stage, remaining tooth structure, and expected duration. Eugenol-containing materials, resin-based options, and reinforced temporary cements each have practical strengths and limitations. Their compatibility with future bonding procedures must also be considered. Clinicians should follow manufacturer instructions and document relevant findings.

No protocol is flawless. Material failure can still occur despite careful technique, especially with heavy chewing forces, bruxism, poor hygiene, or delayed follow-up. This guide presents clinically informed principles, but it cannot replace examination, diagnosis, or professional judgment. Patients should seek review if the filling feels high, becomes loose, causes persistent sensitivity, or exposes the tooth. Reliable care includes knowing when the temporary solution is no longer adequate.
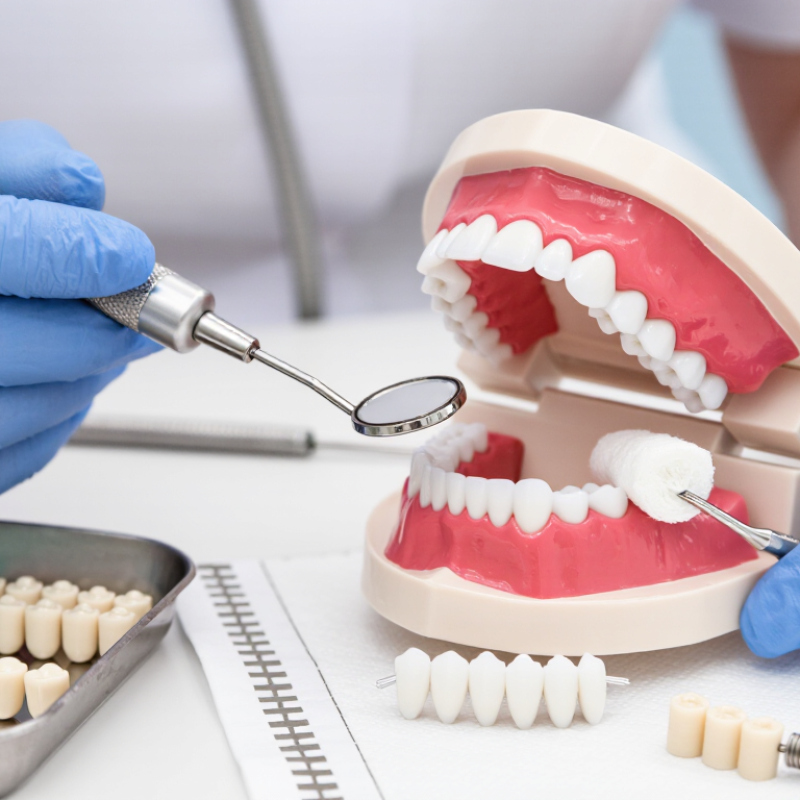
2026 Best Guide to Optimizing Temporary Filling Procedures

Screen Indications Using AAE Diagnostic Criteria and Periapical Imaging

2026 Best Guide to Optimizing Temporary Filling Procedures

Screen Indications Using AAE Diagnostic Criteria and Periapical Imaging

A temporary filling should follow a clear pulpal and apical diagnosis. The American Association of Endodontists recommends recording symptoms, vitality responses, percussion, palpation, and periodontal findings. Periapical imaging then adds anatomical context. Check the whole root, furcation, lamina dura, and surrounding bone. Do not treat a radiolucency alone. Early apical inflammation may produce no visible change.

The 2022 World Health Organization Global Oral Health Status Report estimates that untreated caries affects about 2.5 billion people worldwide. That scale makes consistent screening essential. A properly angled periapical image can reveal deep decay, widened periodontal ligament space, or an incomplete restoration. Still, one image can mislead. I sometimes review the first film twice, because a familiar tooth can appear more reassuring than it is. The AAE and AAOMR Joint Position Statement advises against routine three-dimensional imaging. Consider limited-field imaging only when symptoms and two-dimensional findings disagree, or anatomy remains unclear.

Tips: Use a paralleling technique and record exposure quality. Repeat the image only when it changes clinical confidence. Mark cold-test results beside the tooth number. If pain persists after temporary placement, reassess occlusion, leakage, pulp status, and the image. A short follow-up interval is useful, but it cannot repair a weak diagnosis.

Prepare a 3–4 mm Temporary Seal Based on Endodontic Leakage Studies

2026 Best Guide to Optimizing Temporary Filling Procedures

A 3–4 mm temporary seal is a practical target after endodontic access. Laboratory leakage studies indicate that inadequate thickness may permit fluid movement and bacterial penetration. The exact requirement depends on the material, cavity shape, and remaining tooth structure. Measure the depth visually and with a periodontal probe when access allows. Do not rely on appearance alone.

Before placement, remove debris and control moisture without excessively drying dentin. The cavity walls should look clean, not glossy with pooled fluid. Place the temporary material in one controlled increment when possible, adapting it against the pulpal floor and cavity margins. A firm 3–4 mm layer should resist occlusal pressure. Check the bite carefully. A high restoration can fracture or dislodge the seal during chewing.

The 3–4 mm rule is useful, not magical. Leakage studies often use controlled laboratory conditions, while clinical cavities are irregular and contaminated by saliva. I have seen apparently thick seals fail because a thin margin remained near the access outline. That detail deserves more attention. Recheck marginal adaptation, remove unsupported excess, and document the material thickness when clinical conditions are uncertain. Temporary restorations should remain intact only for the planned treatment interval, with earlier review if pain, looseness, or visible breakdown develops.

2026 Best Guide to Optimizing Temporary Filling Procedures — Prepare a 3–4 mm Temporary Seal Based on Endodontic Leakage Studies
Procedure Dimension Recommended Target Clinical Rationale Leakage-Related Evidence Summary Practical Quality Check
Temporary material thickness 3–4 mm of intact temporary material A thicker material layer generally provides a longer diffusion path and better resistance to dissolution, fracture, and marginal penetration than a very thin layer. Consistently supported principle: inadequate thickness is associated with increased marginal leakage in laboratory studies. Measure the remaining access depth before placement. Do not count the thickness of a cotton pellet as part of the seal.
Access cavity design Preserve sound walls and avoid unnecessary enlargement Sound enamel and dentin walls improve mechanical retention and reduce the exposed perimeter of the temporary restoration. Leakage increases when margins are irregular, unsupported, fractured, or contaminated during placement. Remove weak enamel or unsupported restorative remnants, but retain as much sound tooth structure as possible.
Pulp-chamber spacer Use the thinnest practical spacer; maintain a 3–4 mm coronal seal A spacer can help later removal, but excessive thickness reduces the amount of sealing material and may compromise retention. Studies and clinical protocols commonly identify the thickness of the temporary material—not the spacer—as the critical sealing variable. Place the spacer below the level needed for the final 3–4 mm seal and confirm that it is stable and centered.
Material selection Choose a temporary restorative material with low solubility and adequate compressive strength Material choice should match the expected interval, occlusal load, moisture exposure, and ease of later removal. In vitro leakage results vary by formulation, thickness, setting conditions, thermocycling, and test method; no single material performs best in every study. Follow the manufacturer-independent product instructions for mixing, placement, working time, and setting time without naming or relying on a brand.
Moisture control Keep the cavity clean and free of saliva and blood during placement Contamination can interfere with adaptation, bonding, setting, and marginal integrity. Contamination and premature exposure to moisture are repeatedly associated with poorer sealing performance, although some materials require controlled moisture to set. Use isolation, remove visible fluid, and apply the material under the moisture conditions required for that material class.
Internal surface preparation Clean the access without leaving debris, irrigant pools, or unsupported material Debris and liquid films can create voids or prevent intimate adaptation to the cavity walls. Voids and interfacial gaps are common pathways for tracer penetration in laboratory leakage models. Inspect the cavity under adequate illumination and blot excess liquid before placement; avoid desiccating tissues when the material requires moisture.
Placement technique Place in controlled increments or one well-adapted mass, depending on material handling Firm adaptation to the walls and floor reduces internal voids and improves resistance to dislodgement. Poor adaptation, air entrapment, and incomplete cavity filling are recognized causes of increased leakage. Press the material against all cavity walls, eliminate visible voids, and contour the occlusal surface before final setting.
Occlusal adjustment Remove premature contacts while preserving adequate bulk Excessive occlusal loading can cause fracture, wear, or loss of the temporary restoration. Mechanical breakdown can convert an initially acceptable marginal seal into a leakage pathway. Check static and functional occlusion after the material has set sufficiently; do not over-reduce the restoration below 3–4 mm.
Setting protection Protect the restoration from saliva, chewing, and displacement until adequately set Early loading or moisture contact may weaken the surface and disturb the marginal seal. Setting time and early moisture exposure influence surface integrity and leakage behavior, especially for water-sensitive materials. Observe the material’s stated setting requirements and advise the patient to avoid chewing on the treated tooth until the material has set.
Expected service interval Keep the temporary restoration only until the next planned treatment stage Temporary materials are not intended to replace a definitive coronal restoration for an extended period. Clinical studies show that coronal leakage risk increases with time, material degradation, marginal wear, and loss of restoration integrity. Arrange timely follow-up and replace the temporary seal immediately if it is fractured, missing, open at the margin, or contaminated.
Post-placement inspection Verify continuity, marginal adaptation, occlusion, and at least 3–4 mm bulk A visual and tactile inspection can identify defects before the patient leaves the appointment. The quality of placement is a major determinant of leakage; laboratory material rankings cannot compensate for a defective clinical seal. Document the material type, estimated thickness, occlusal adjustment, and any remaining concerns in the clinical record.
Evidence note: Endodontic leakage studies are predominantly laboratory-based and use different dyes, bacteria, fluids, thermocycling protocols, specimen designs, and observation periods. Therefore, the 3–4 mm thickness target should be treated as a practical clinical minimum for the temporary seal, not as a guarantee of bacteria-tight sealing.

Select Materials Under ISO 3107, ISO 9917-1, and ISO 4049 Standards

2026 Best Guide to Optimizing Temporary Filling Procedures

Selecting a temporary filling material requires more than checking its setting time. The intended clinical use must match the applicable ISO standard. ISO 3107 covers zinc oxide/eugenol and zinc oxide/non-eugenol cements. These materials can provide a practical short-term seal and easy removal. However, eugenol may interfere with some resin-based restorative materials. That detail is easy to overlook.

ISO 9917-1 applies to water-based dental cements, including acid-base materials. Review working time, setting behavior, film thickness, and strength data. A material that mixes smoothly may still fail under heavy occlusal pressure. Keep the field clean and reasonably dry. Moisture can change handling and weaken marginal adaptation. Small details matter.

ISO 4049 addresses polymer-based restorative materials. Check curing requirements, depth of cure, adhesion strategy, and intended use before placement. Do not assume that every resin material is suitable for a temporary filling. Follow the manufacturer’s instructions and confirm the current standard edition. Standards support quality control, but they do not replace clinical judgment. A perfect seal is not realistic in every situation. I would reassess the filling after placement, especially when the patient reports high bite pressure, sensitivity, or food packing. Even careful procedures need reflection.

Place and Finish the Filling Within Manufacturer-Specified Setting Times

2026 Best Guide to Optimizing Temporary Filling Procedures

A temporary filling succeeds when placement and finishing respect the material’s setting window. The operator should read the current instructions before treatment, because setting times vary with temperature, moisture, mixing, and cavity size. ISO 3107:2018 identifies testing requirements for temporary restorative materials, but clinical conditions can still alter performance. Use a timer, not memory. Timing is unforgiving.

After mixing, load the material promptly and place it in one controlled increment when appropriate. Adapt it firmly into the cavity, especially along margins and internal angles. Remove visible excess before the material becomes rubbery. Then wait for the manufacturer-specified setting time before final carving or occlusal adjustment. Premature finishing may pull material from the margin. Delayed finishing can make removal unnecessarily difficult. I have found that a dry field helps, but excessive drying may irritate exposed dentin.

Check the occlusion with thin marking paper after setting. A high contact can produce tenderness or early failure. The CDC’s National Health and Nutrition Examination Survey reported untreated dental caries in 25.9% of U.S. adults aged 20–64 during 2017–2020, showing why dependable interim care remains clinically important. (CDC, Oral Health, 2023) The FDI World Dental Federation also reports that oral diseases affect nearly 3.5 billion people worldwide. (FDI, Global Oral Health Atlas, 2022) These figures do not replace clinical judgment. They reinforce the need for disciplined, repeatable timing. My own weak point is rushing the final check. That mistake deserves attention.

2026 Best Guide to Optimizing Temporary Filling Procedures

Place and finish the filling within the manufacturer-specified setting times.

The chart shows representative manufacturer-specified time ranges in minutes for common temporary filling material categories. Actual times can vary with temperature, moisture, cavity conditions, mixing technique, and product formulation. Complete placement, contouring, and finishing before the working time ends, then protect the restoration until the stated final setting time has been reached.

Review Within 1–4 Weeks and Replace Fillings with Defects or Symptoms

A temporary filling protects a prepared tooth while it heals or awaits permanent treatment. Its condition can change quickly, especially during the first few days. Avoid chewing hard foods on that side, and keep the area clean with gentle brushing and careful flossing.

Schedule a review within one to four weeks, even if the tooth feels normal. A dentist can check the filling’s seal, height, edges, and the surrounding gum tissue. Bring specific observations, such as pain when biting, sensitivity to cold, a rough edge, or a loose feeling. These details help guide a more accurate clinical assessment. Waiting for severe pain is not a reliable strategy.

Replace the temporary filling promptly if it cracks, falls out, becomes visibly worn, or causes continuing symptoms. Persistent throbbing, swelling, fever, or difficulty opening the mouth needs faster professional attention. Do not attempt a household repair. It may hide leakage or alter the bite. In practice, patients sometimes underestimate small defects because chewing still seems possible. I have also seen people confuse temporary sensitivity with normal healing. That assumption can be wrong. A review gives the dentist a chance to correct the filling, investigate deeper irritation, or proceed with a permanent restoration when conditions are suitable. Appointment timing may change if decay, infection, or treatment delays are present.

FAQS

What should be checked before placing a temporary filling?

Record symptoms, vitality responses, percussion, palpation, and periodontal findings. Diagnosis should guide treatment.

Why is periapical imaging useful?

It shows root shape, furcation areas, lamina dura, surrounding bone, and possible decay depth. One image can mislead.

Should a radiolucency alone determine treatment?

No. Early apical inflammation may show no visible change. Combine imaging with clinical findings.

When is limited-field three-dimensional imaging reasonable?

Consider it when symptoms conflict with two-dimensional findings, or when root anatomy remains unclear. Use restraint.

How can image quality be improved?

Use a paralleling technique and record exposure quality. Repeat an image only when it changes clinical confidence.

What should be documented during vitality testing?

Write cold-test results beside the tooth number. Clear notes reduce confusion during follow-up.

Which factors matter when choosing temporary filling material?

Consider intended use, setting time, strength, film thickness, moisture tolerance, and removal needs. Smooth mixing is not enough.

Can some temporary materials affect later restorations?

Yes. Certain ingredients may interfere with resin-based materials. Check compatibility before placement.

What should be checked after placing the filling?

Reassess bite pressure, sensitivity, leakage, pulp status, and food packing. Small defects matter.

What if pain continues after temporary placement?

Review occlusion, sealing, pulp findings, and imaging. A short follow-up helps, but it cannot fix a weak diagnosis.

Conclusion

Optimizing Temporary Filling Procedures requires a structured approach that begins with accurate diagnosis. Clinicians should screen treatment indications using AAE diagnostic criteria alongside periapical imaging to confirm the need for temporary protection and identify possible symptoms or structural concerns. After cleaning and shaping, the temporary seal should generally provide approximately 3–4 mm of material to reduce the risk of coronal leakage, based on established endodontic leakage principles.

Material selection should consider the requirements of ISO 3107, ISO 9917-1, and ISO 4049, including strength, dimensional stability, handling, and sealing performance. The filling must be placed, adapted, and finished within the manufacturer-specified setting time to achieve reliable retention and marginal integrity. A follow-up visit within 1–4 weeks is essential. Any filling with visible defects, loss of seal, tenderness, swelling, or other symptoms should be assessed promptly and replaced when clinically indicated.

Liam

Liam

Liam is a dedicated marketing professional with a profound expertise in the industry, where he excels at highlighting the unique advantages of our core products. With a keen understanding of market trends and consumer needs, Liam frequently updates our company’s professional blog, providing......